Kangaroo Paw Makeover -Going From Drab To Fab In Five Minutes
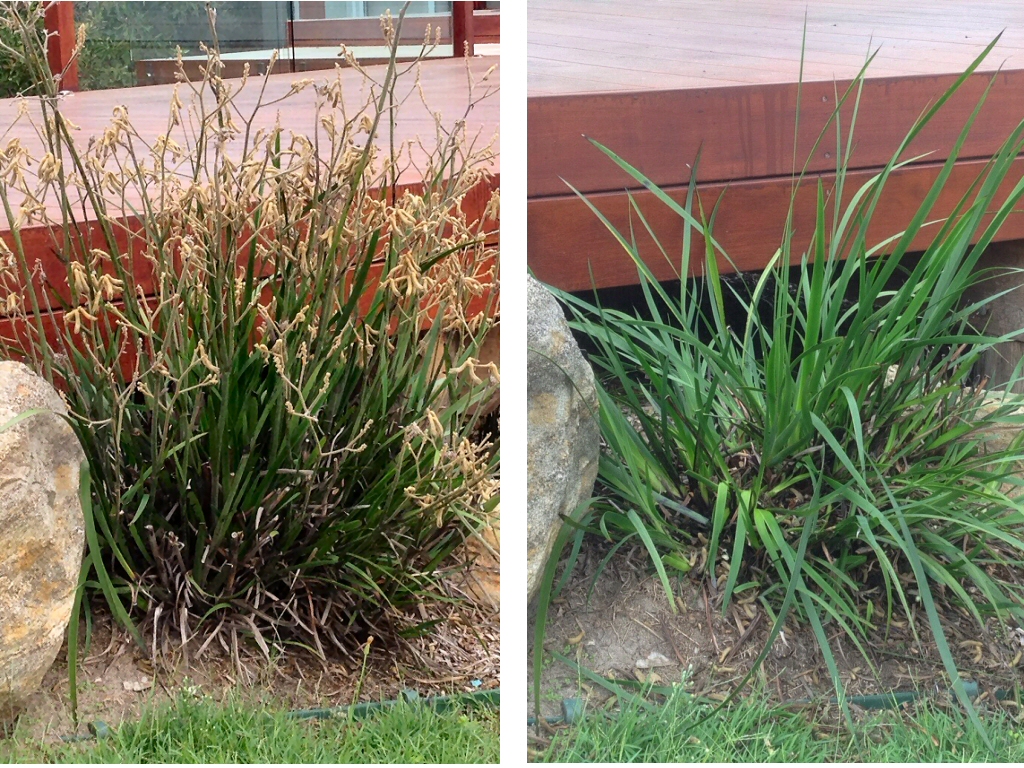
Kangaroo Paws are a magnificent addition to any Australian garden. They come in many different varieties, sizes and colours. Their dense foliage and unique flowers can really give that ‘wow factor’ to your garden. But around Autumn, people will ask me what they can do about their kangaroo paw that looks like it is dying. After so long growing kangaroo paws, I know most times what the problem is likely to be. It just needs a few minutes time for a horticultural make-over!
To get your kangaroo paw looking its best, it is important to give your kangaroo paw a bit of a clean out and cut back once in a while. The optimum time to do this is after the main flush of flowers die back. Once the flowers have turned brown, you may also notice some browning of the leaves. A kangaroo paw uses a lot of energy to produce flowers, and this can leave the plant looking quite shabby as it runs down its food reserves. In this newsletter, I will show you how to remove the dead and damaged leaves and the old flowers. Doing so will not only mean your kangaroo paws will look more aesthetically pleasing, but it will stimulate the plant to produce new growth.
When is the best time to cut back a kangaroo paw?
As previously said, the best time to do the cut back is when the flowers stems have died back. Tall kangaroo paws flower abundantly once a year in spring to summer, making the clean up easy and quick…. a cut back in late Summer to early Autumn and they are ready to concentrate on putting on new vegetative growth. Medium sized and small varieties will have a main flush flowers in Spring, but will go on to repeat flower at other times, so clean up times for these ones will be done as needed.
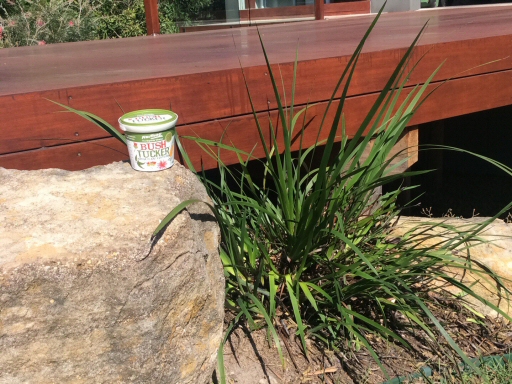
Some kangaroo paws can end their flowering season looking really browned off and tired! However, with the right method of cut back, you might be surprised with how well even the most awful looking paw can clean up. For the purposes of this article I have found a tall kangaroo paw that had a wonderfully large display of flowers in Spring and Summer. This paw is perfect for the demonstration and by the time we have finished the cut back, it will be happy and healthy again and an asset to the garden even without flowers.
The cut back process:
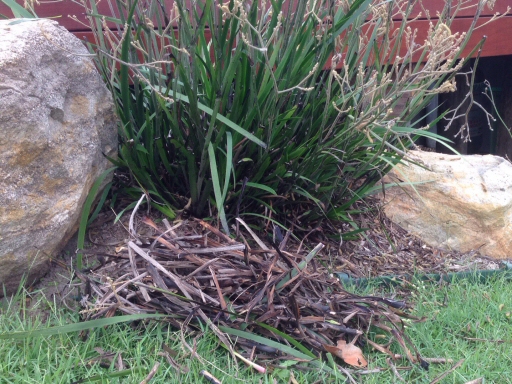
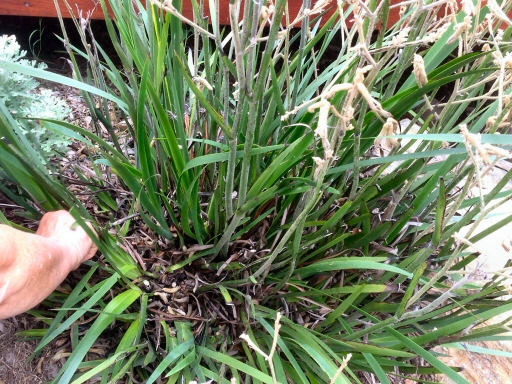
Remove the loose dead and damaged leaves so you can see what else needs further attention. Any leaf that is brown or has patches of brown can be removed. The photo below shows how much old leaves can be pulled away in a minute’s work-
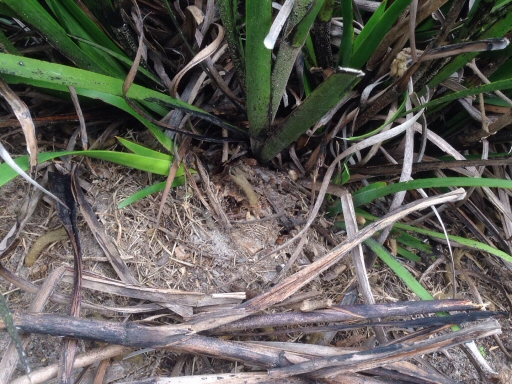
Once you have removed all the grotty leaves, it’s time to locate the leaf fans which contain the dead flower stems. If you closely look at a kangaroo paw as it is budding up, you see that the flower stem is contained within a leaf fan. Once this flower dies off, the part of the fan that gave rise to it starts to decline as well, and this is what gives the plant the tired look. It is common for people to just cut the dead flower stem and leave the old foliage, thinking it will help the plant. But once a leaf fan has sent up a flower shoot, that fan will not flower again…. the plant instead sends up new vegetative growth for the new flowering. So, it is generally a good idea to remove each leaf fan that has a dead flower stem from the plant.
Cut low down near the base, but exercise caution not to cut into the rhizome. The rhizome is the part of the plant that sends out new roots and new shoots, and it also acts as a storage of food for the plant for tough times. Keeping rhizomes intact ensures new growth will be possible. Only remove the leaf fans that contain dead flower stems. Leave the ones that are healthy and have not yet produced a flower, as these will help the plant recover from the cut back. You can see in the photo below what I mean- the old part in the centre is to be cut away, the new shoots to the right and left will stay-
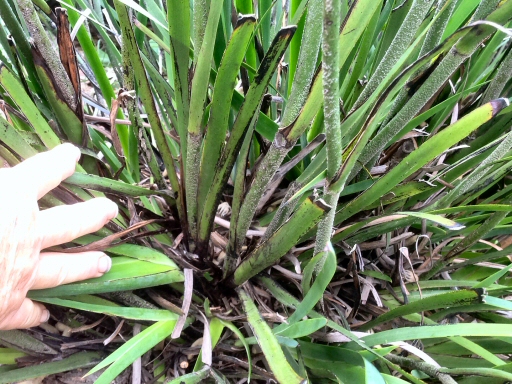
As you remove dead leaves, flower stems and old leaf fans, you are opening up the plant, allowing for air flow and, most importantly, room for new growth. This allows the plant to grow and flower to its maximum potential.You can see in the photo below just how much the old growth is crowding the new growth from developing….the two old flower stems in the centre have to go!
 The next photo shows how much more room cutting back just those two old bits creates for the plant-
By cutting back your kangaroo paw at the end of its flowering season, you are ensuring that the next time it flowers, it will have optimal conditions to do so. It only takes a few minutes to reveal the healthy plant that has been there all the time! You can use all the old kangaroo paw offcuts for your compost or worm farm, or alternatively, put them straight back into the garden as mulch.
The last step, which can sometimes be overlooked, but is really important not to forget is fertilise and water your kangaroo paw. Once you have cut back your paw it will want to produce new growth. So this is a good time to fertilise, which will give your paw the boost it needs. If you cut your paw back at the end of Summer/beginning of Autumn and fertilise it, this will give it enough time to grow and establish itself in order to cope better with the colder, more harsh conditions of Winter. If you are in the colder parts of Australia and may get early frost, use a low nitrogen fertiliser or none at all, as nitrogen encourages soft growth which is easily damaged. I will talk about care of kangaroo paws in frost and snow in a future newsletter.
Autumn Planting:
Autumn is a great time to be in the garden! The heat waves of Summer are over and the cold of Winter has not yet hit. The Autumn months provide a fantastic opportunity to put some new plants into the garden.
This is a good time to plant Spring flowering perennials too, like my favourite kangaroo paws. The soil temperature takes longer than the air to cool down, so the root system gets a chance to get established before Winter, and in the case of kangaroo paws, the plant should develop into a reasonable sized clump and new leaf fans, which each give rise to a flower stem. With all the above information in mind, once they finish flowering, you will have all the knowledge you need to cut them back and keep them healthy.
Pop into your local native plant nursery to see what they have and for one on one advice on what is right for your needs.
Autumn is also a wonderful opportunity to plant some home grown edibles. Now is the right time to be planting things like peas, silver beet, broccoli, lettuce, kale, beetroot, carrots. Harvesting some worm castings to mix into the soil where you will be planting your home grown vegetables will give the plants some added nutrients to help aid in their growth.
Worm Farm Myth Busting – The Pineapple Project:
I have been very busy in the ‘Angus Worm Lab’ lately and if you follow my face book or instagram page, you might have noticed numerous composting and worm farm pictures and videos. I posted a video not too long ago, of worms congregating around a large chunk of pineapple that I placed into one of my worm farms. It was a fascinating sight to see huge clumps of worms in and around the piece of pineapple. There were a few comments about how pineapple shouldn’t be placed in the worm farm due to acidity and the protein digesting enzyme called bromelain. A quick search over the internet revealed many different sites saying the same thing. Some sites even suggested that the pineapple could harm and even kill the worms. I decided to do some myth busting and put this to the test! I acquired quite a few pineapples, ate the contents and placed the scraps into one of my worm farms. I must add here that this is the most delicious experiment I have ever conducted. I was also lucky enough to receive a few whole pineapples that had over ripened and began to degrade. Not so good for human consumption, but perfect for the worms!
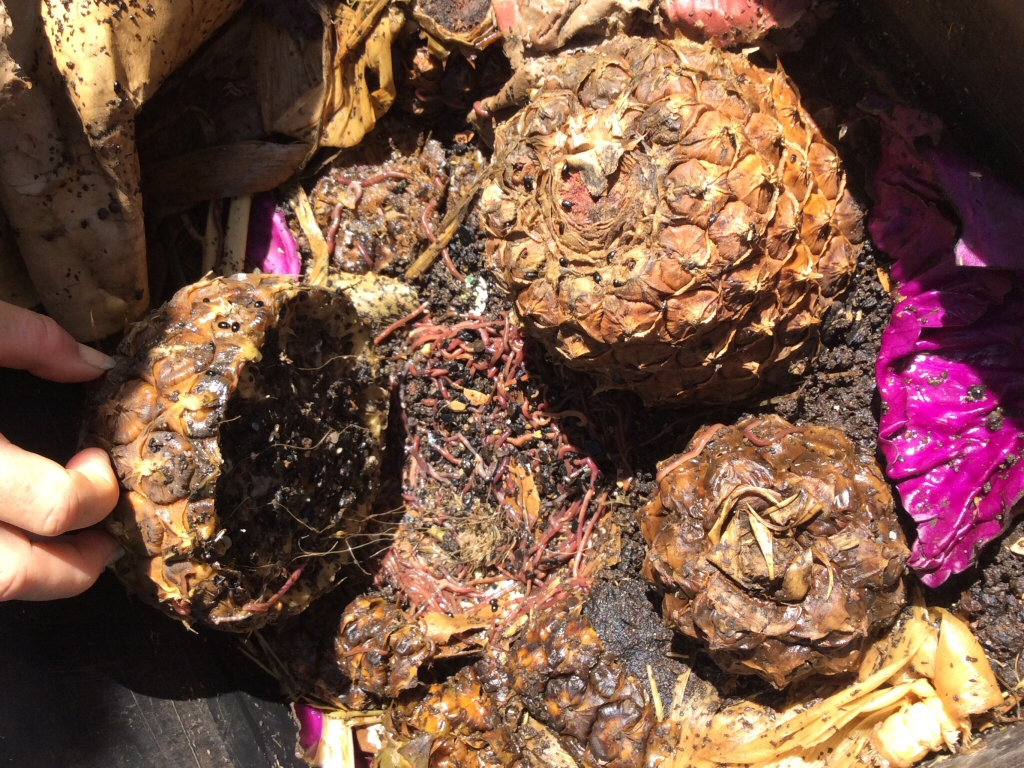
I literally blanketed one of my worm farms with pineapple scraps, including the core of the pineapples, which is said to be the part of the pineapple that contains the most bromelain. Two days later and the worms had once again noticeably congregated in and around the pineapple. They certainly did not look to be sick, dead or dying. On the contrary, they looked extremely active. A special mention here to my acrobatic worm, which dangled graciously from the pineapple, doing twists and turns as I filmed my video for instagram!
One week later, I checked on the pineapple experiment again. When I opened the lid and peeled back my worm blanket I was amazed! The worms were not only in and around the pineapple, they were also on top of it. As you can see from the picture, it’s not just one or two stray worms, they really are clumping in and around the pineapple. When I lifted the pineapple pieces up I could see lots and lots of worms all intertwined inside the pineapple amongst the fibres. They are devouring the flesh of the pineapple, working their way through it. I believe that if the pineapple was going to harm the worms in some way, or kill them we would have begun to see some evidence of this after one week had passed. Placing an abnormally large amount of pineapple into the worm farm is a great way to test the effects of it. If my worms were unharmed from blanketing my worm farm with pineapple, then I’m sure it is safe to say that pineapple will not kill or harm your worms. It is important to note here that acidity naturally builds up in all worm farms over time, even if you are avoiding adding acidic waste to it (such as citrus, onions and garlic). To keep the correct PH level in your worm farm you can add Tumbleweed’s worm farm & compost conditioner or a sprinkle of lime in on a regular basis.
I passed the findings of my pineapple experiment on to Tumbleweed and they are going to feature it as a post on their Instagram account. If you have Instagram and would like to take a look head over to: @tumbleweedgardening
Events:
It was an absolute honour and pleasure to sit beside the legendary Peter Cundall at the Garlic and Tomato Festival in Launceston this month. It certainly was a fun filled day and if you missed out on going this year fear not, it is an annual event.
Join Tino Carnevale and myself on Saturday the 7th April at the SA Autumn Garden Festival 2019. Clare Showgrounds, Clare, South Australia.
This is a fantastic opportunity to hear from some of Australia’s top gardening experts and stock up on the latest plants and accessories.
Visit over 60 exhibitors, all nestled under magnificent Eucalyptus trees at the northern end of the Clare Show Grounds.
Coming up in May, I will be back on the NSW Central Coast for an event close to my heart (and fingernails)- Mad About Dirt. I will be joined again by Tino Carnivale and Simon Leake, soil scientist and my co-author of “Grow Your Own’…there will be practical demonstrations and talks on soil science and analysis, composting and worm farms, permaculture and regenerative agriculture, chemistry and biology, and getting hands on with it all.