With these step by step instructions, I will show you how to repurpose a pallet by turning it into a raised garden bed. The pallet garden bed is a wonderful DIY project and a comparably cheap way to get you on your growing journey. All the wood you need to build one garden bed is contained in a single pallet. You will also need some simple tools and be prepared for a bit of grunt work. Pulling the pallet apart will require some muscle power, but it’s all part of the experience and a great way to get in your daily physical activity. The pallet garden bed is perfect for those who are in a rental property as it’s light and easy to take down and move if needed. It can also be turned into a wicking bed, which we will cover in a future article.
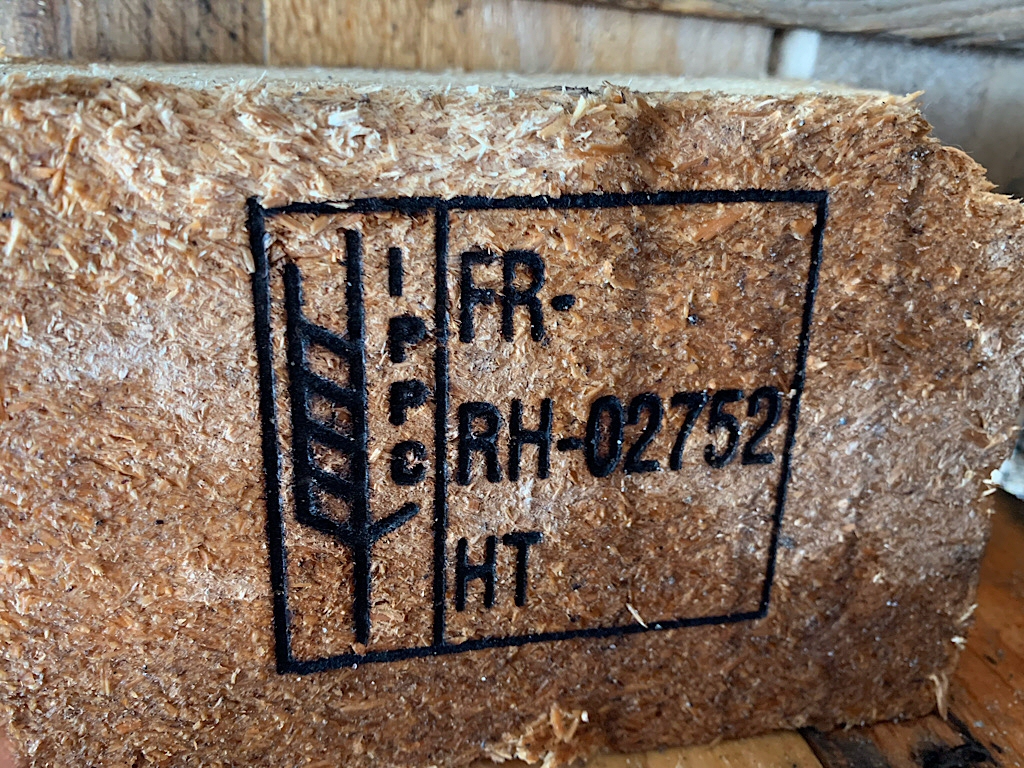
Before you take some pallets home, be aware that pallets from overseas are treated to prevent bugs and fungus also coming along for the ride from other countries. These will be stamped with an identification code, according to regulations set by the International Plant Protection Convention (IPCC). It is wise to only use pallets that are stamped for your own peace of mind. You will find a stamp, which will have the IPPC mark, also other code which will show the country of origin, but the code you want to look for is HT, which stands for heat treated. They have simply been heated to 56-60 degrees to kill anything unwanted, which makes them quite safe to reuse. Any pallet marked with MB means it has been chemically treated with methyl bromide…..leave those ones where they are!
What you will need:
One pallet: I have a few tips and suggestions here about what to look for in a pallet as some are more suited to this project than others. First of all, you will need a pallet that has supporting blocks (see picture below).
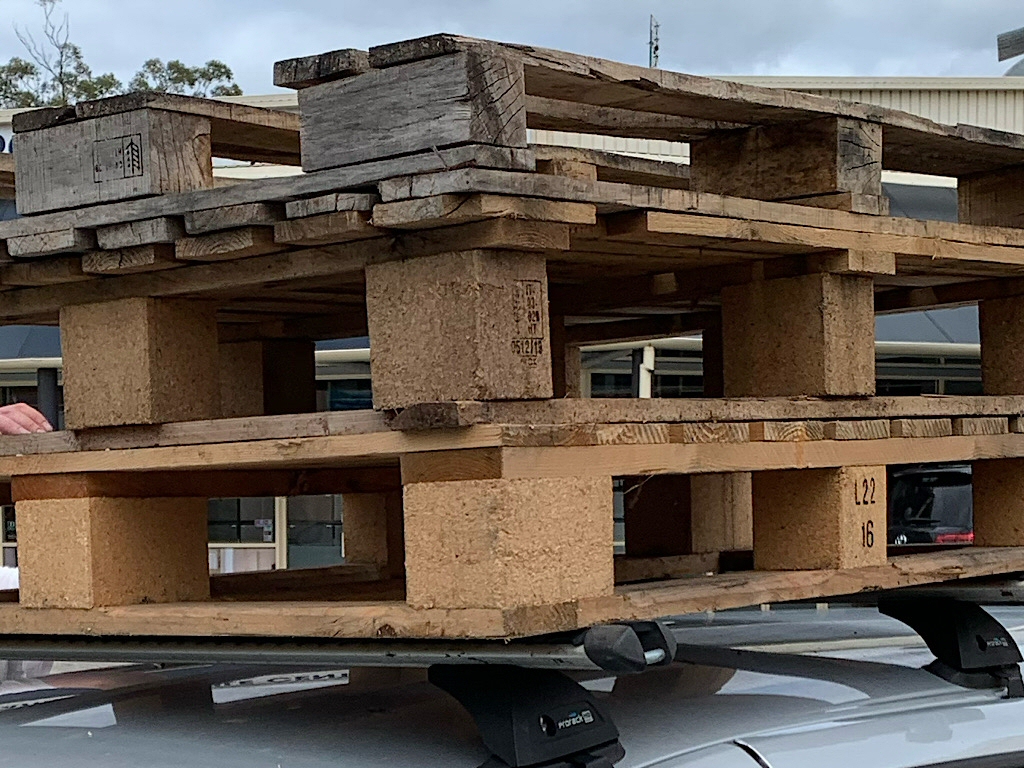
These will be used in the building of your garden bed, so only take home a pallet that has them. You will also need a pallet that has a minimum of 12 lengths of wood. Last, but not least, have a look at the nails on the pallet. Some pallets are fixed together with extremely large nails, which are much harder to remove than the smaller nails. The nail head is usually a good indication of the size of the nail used. If the head is large, the nail is most likely to be long and large too. If you can find a pallet that has smaller nail heads, it will make the disassembling process much easier. You will also need the following:
- Hammer
- Nails
- Saw
- Crowbar
- Nail punch
- Pencil
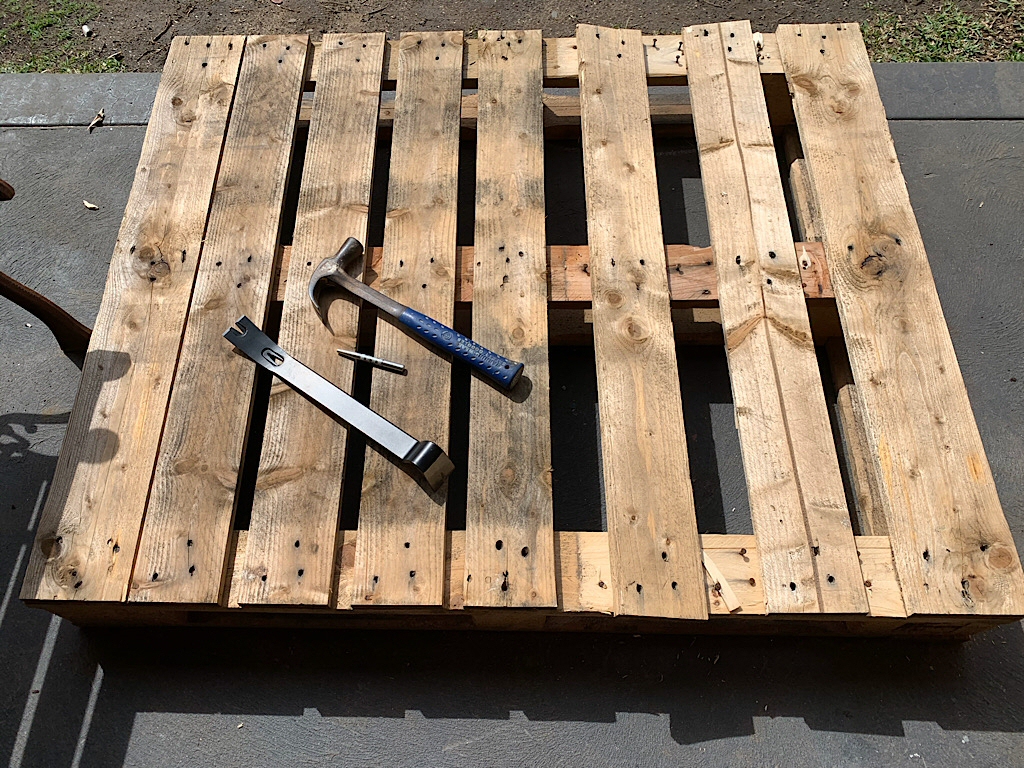
Step one:
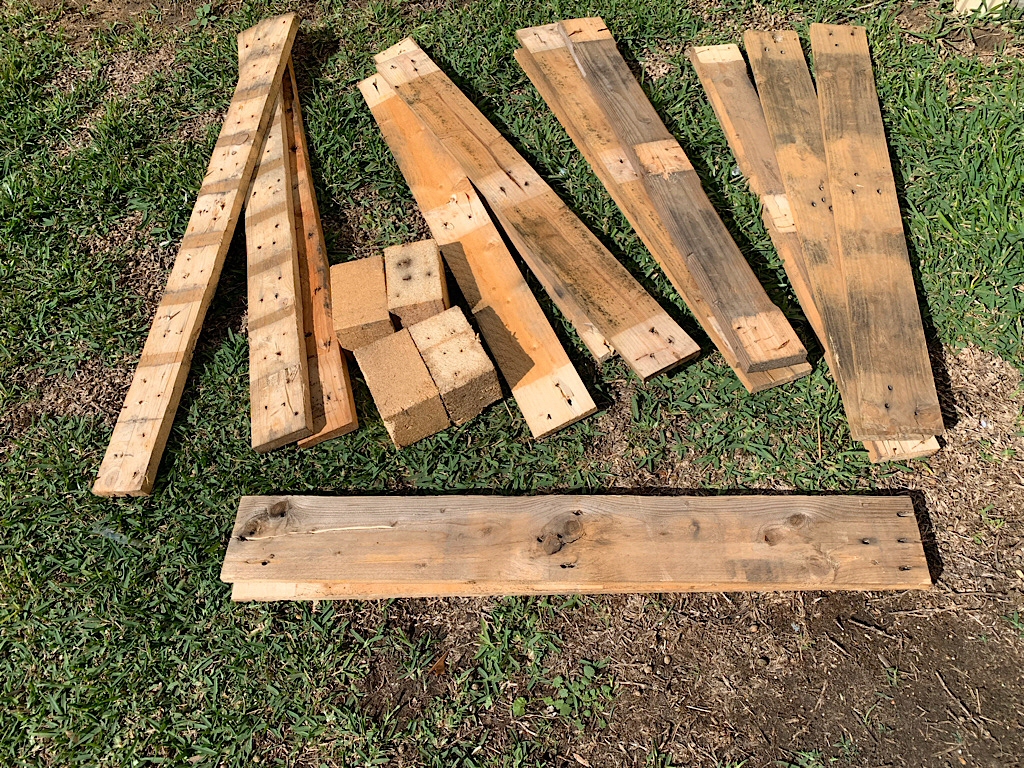
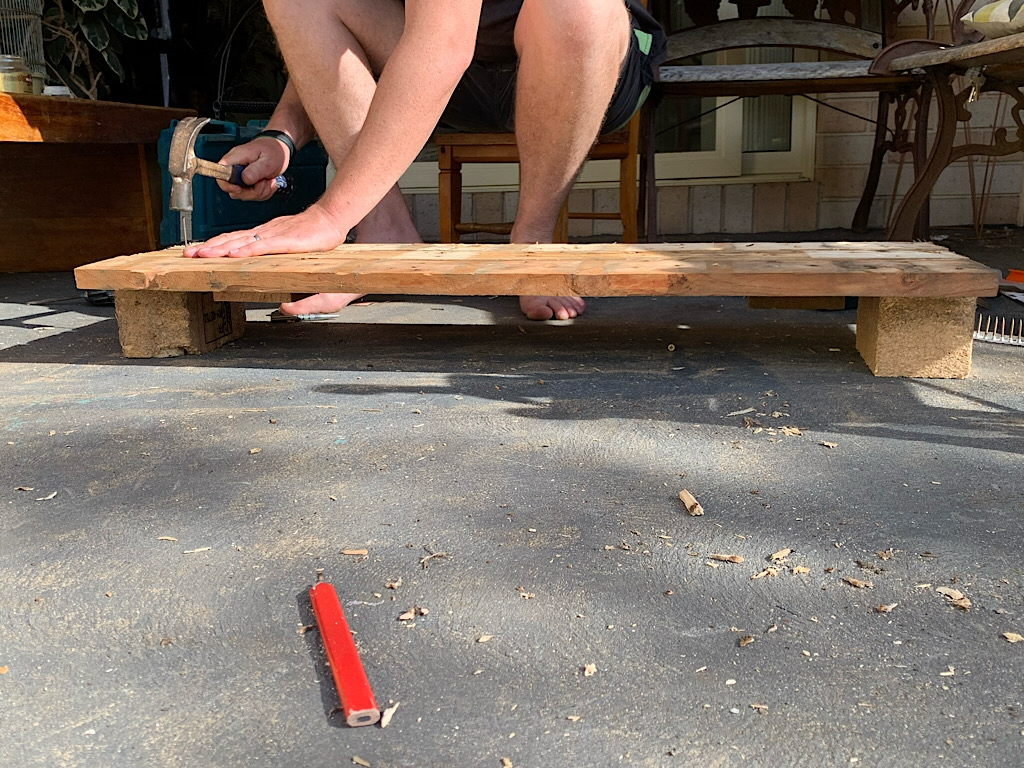
Once you have found your perfect pallet and taken it home, you can take it apart. Using your nail punch and hammer, drive the nails deeper into the wood. Once they are deep enough, use your crow bar to lift off the wood from the pallet. You will need to use a bit of force in this process, but be careful not to snap the planks as you will need them to construct your garden bed. As you remove the planks, you will get the feel for what works and what doesn’t. Take apart the whole pallet and remove any nails that are still sticking out. You can use the back of your hammer or the nail remover on the crowbar for this. Lay your wood into matching length piles. The sides of your garden bed will be three planks high. There will be two odd lengths of wood left over that will be used to in step two.
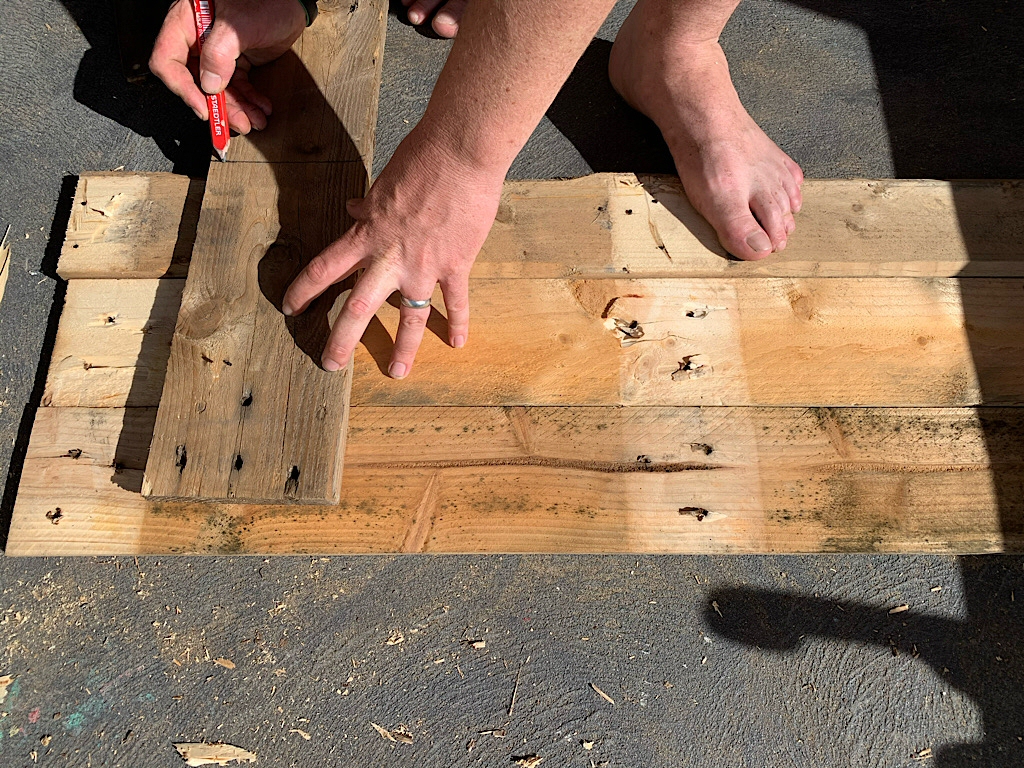
Step two:
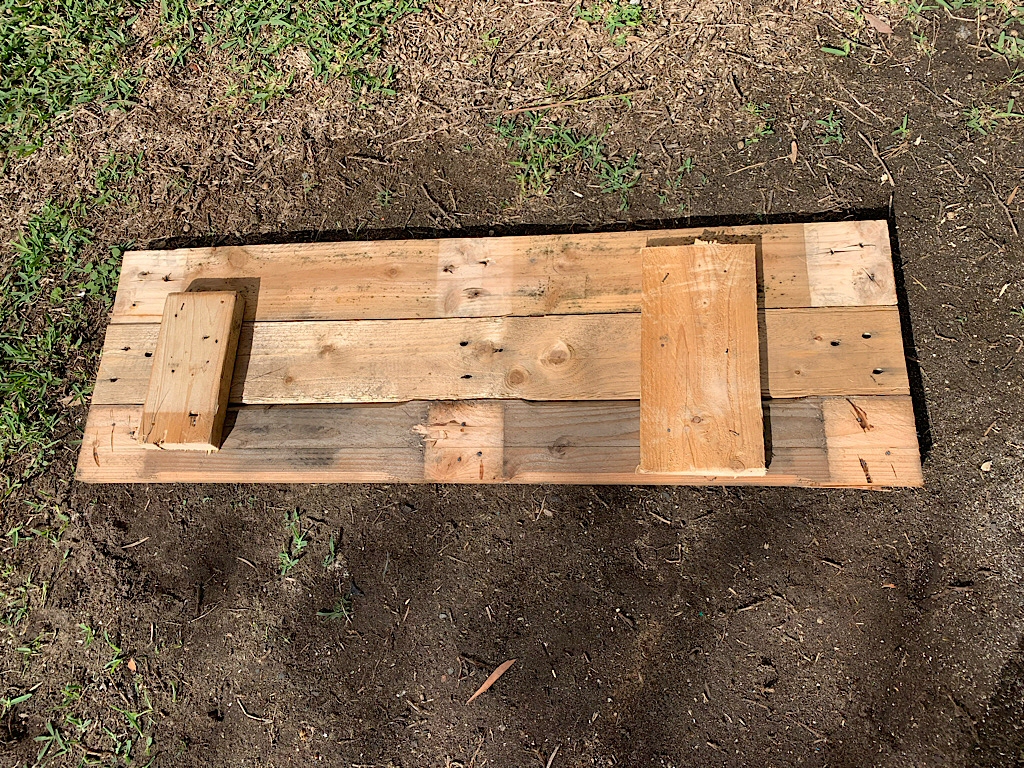
Take three even lengths of wood and line them up on a flat, hard surface to form one edge of your garden bed. Take one of the odd lengths of wood and lay it vertically over the three even pieces of timber. Make sure it covers all three pieces of wood as this will be the piece that holds them together. Draw a line on the timber, cut it to size and nail it on (making sure you leave enough edge to attach support blocks in step three). Make sure all three timbers are joined to the support piece. Do this on both ends. Repeat step two until you have four edges for your garden bed.
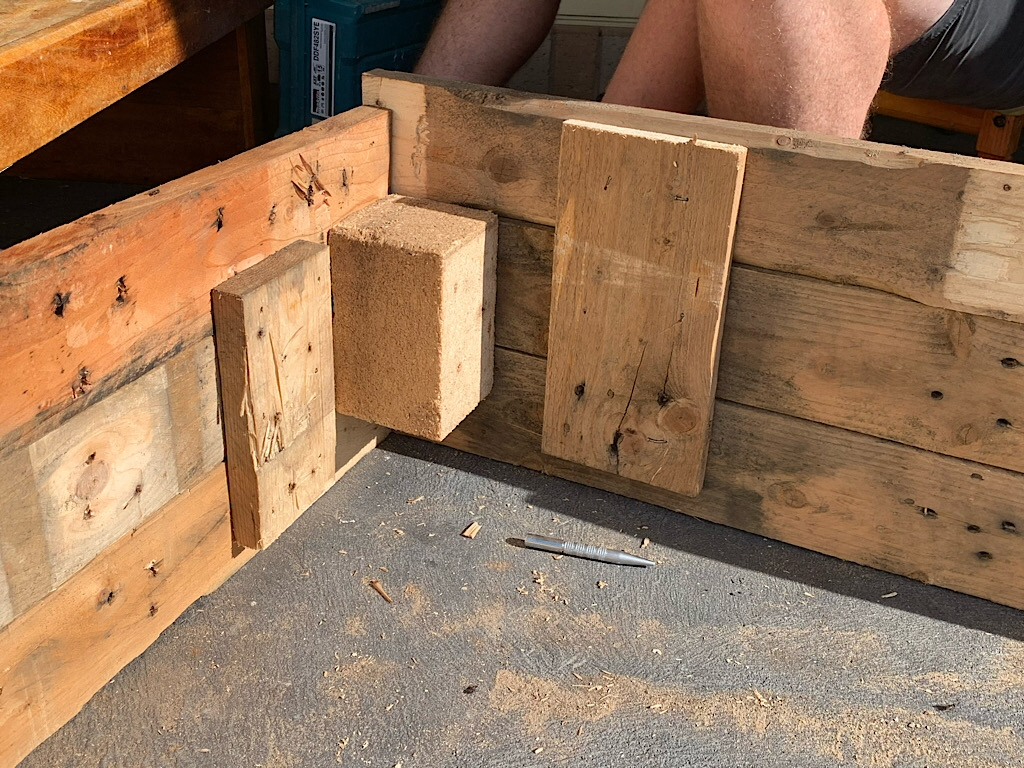
Step three:
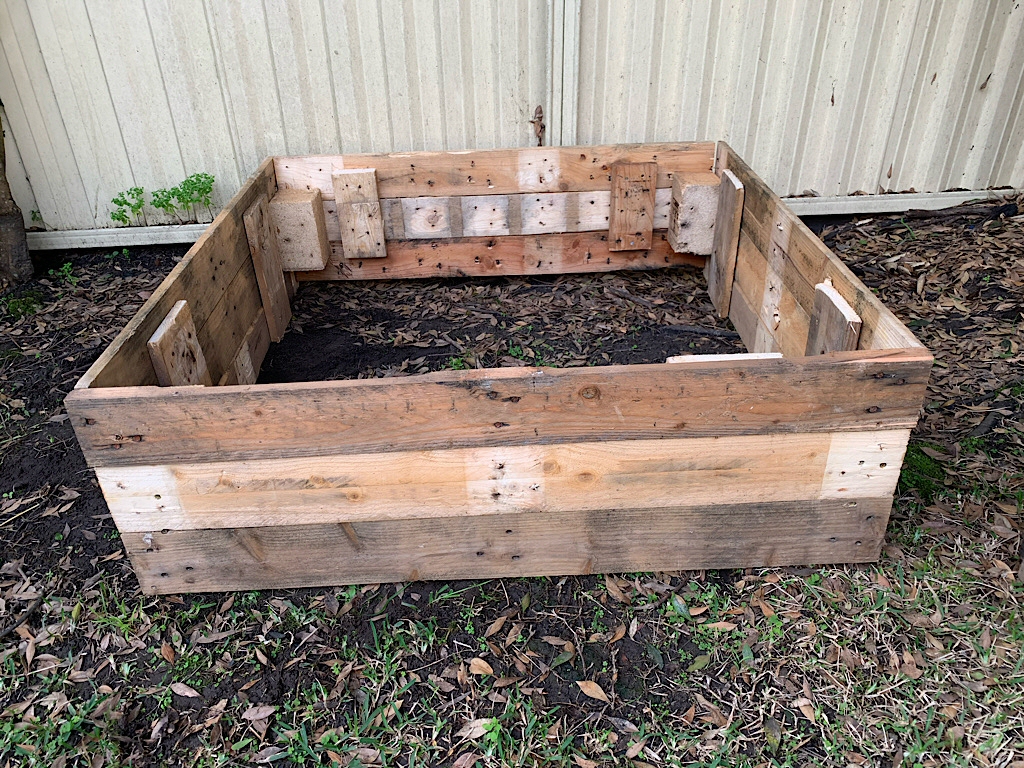
Once you have all four of your garden bed sides assembled, it’s time to attach the little pallet support bocks. The support blocks will join your garden bed together. Take one garden bed side and attach the support block next to the joining timber. Do this on both ends of one garden edge. Stand up your garden bed and using hammer and nails, join the opposing garden edges to the support blocks.
You should now have a completed garden bed!
Step Four:
Place your garden bed where you want it and take the time to marvel at your handy work. And that you have put wood to good use rather than it being sent to landfill. Now all your need to do it fill it with soil. There are plenty of options for this, it’s just a matter of finding out which one suits your needs best. You can order soil from a garden centre, or make your own using compost, existing dirt and other organic matter.
Further Reading:
Compost as fertiliser for growing your own food
How to make free organic liquid fertilisers
Growing Tomatoes in the Home Garden
Growing Garlic, Onions and Leeks
For lots of information on home growing vegies, worm farming and lots more, check out the book
“Grow Your Own – How To Be An Urban Farmer”